Jetnet Help: Setting Up Your Email Account
Jetnet offers a variety of ways to access your email. All of the options displayed below should are available to you.
NB The following assumes you know your email address and password!
NB The following instructions apply if your email account is hosted by Jetnet, regardless of the domain.
If the following doesn't answer your questions, please contact us!
Webmail
This is probably the easiest method of checking your mails, especially if you are travelling and away fromy our normal computer.
- Open a web browser (e.g. Internet Explorer or Firefox)
- Go to the web URL https://www.jetnet.co.uk/email/
- Enter your email address and password
The webmail system can be used alongside your existing email application.
NB The webmail system is protected by a secure connection.
Email Application
Most people will access their email using an email application that is installed on their computer. The following instructions will guide you through the various settings needed for these applications.
Basic Settings
These settings are the same regardless of the application you use.
| Incoming Server Name | mail.jetnet.co.uk |
| Outgoing Server Name | mail.jetnet.co.uk |
| User Name | [ YOUR EMAIL ADDRESS ] |
Collecting your Mail: POP3 or IMAP?
There are two basic methods of accessing your mail - POP3 and IMAP. Jetnet provides both and offers you the choice of which to use. If you're unfamiliar with what the methods mean, we have provided a list of the pros and cons below.
Wikipedia provides more detail about each system.
| Method | Pros | Cons |
|---|---|---|
| POP3 |
|
|
| IMAP |
|
|
We'd recommend that if you only ever access your mail from a single computer that you use POP3, otherwise the extra flexability of IMAP will make it a better choice.
Thunderbird
Our favourite email client is Thunderbird, from Mozilla. It's free and works on all operating systems. The following shows setting up an account using Thunderbird.
The screenshots were taken on Linux, so some buttons and options may be in different places.
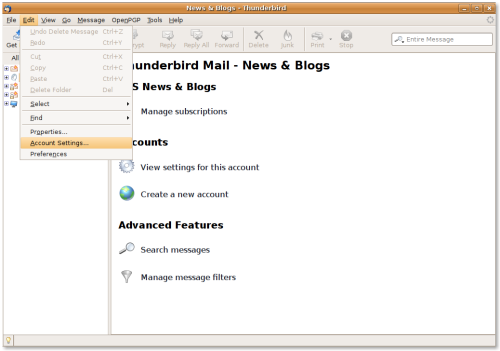
- Choose Accounts from the menu
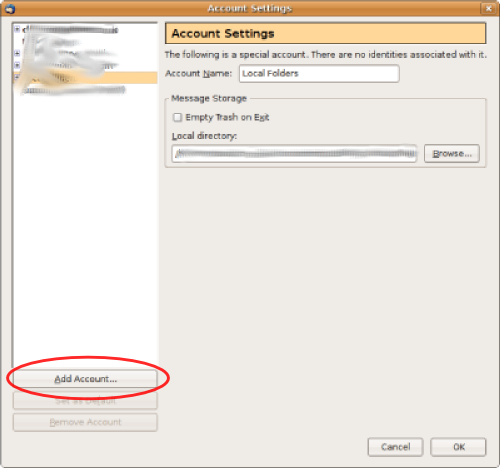
- Create a new account
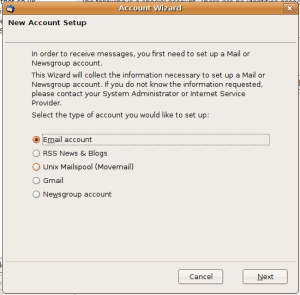
- Choose Email Account
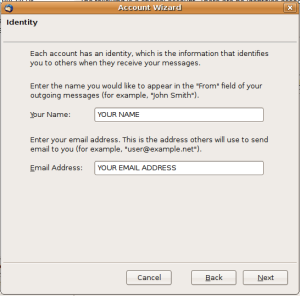
- Enter your name and email address
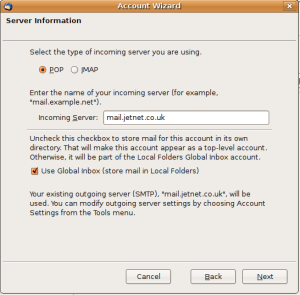
- Choose POP3 or IMAP and enter the incoming server name
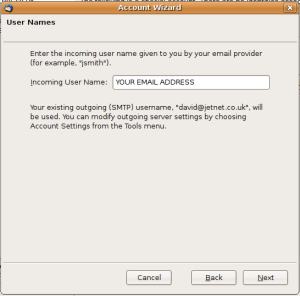
- Enter your email address
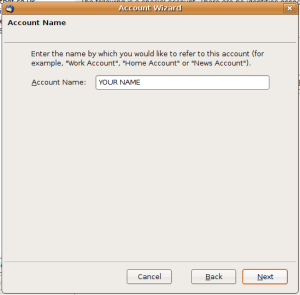
- Enter a name for the account (only used within the application)
You now have the incoming mail connection setup and should be able to connect and retrieve mail. Outgoing mail is setup as follows.
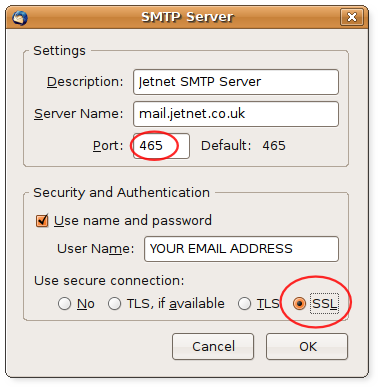
- Add a new outgoing email connection
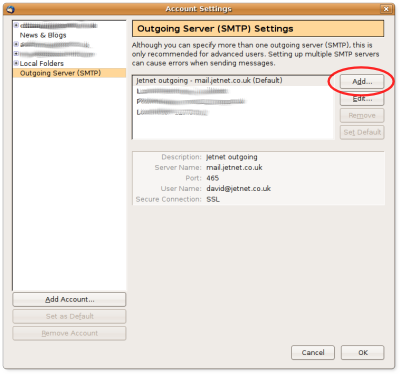
- Enter the basic details
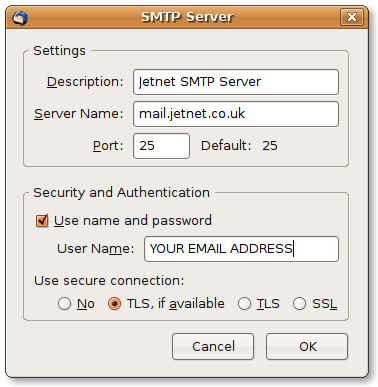
- Switch to using a secure connection, tick the SSL box.
NB the port numbers should change automatically.
At this point you should be able to both send and receive mail. To test, send an email to yourself!
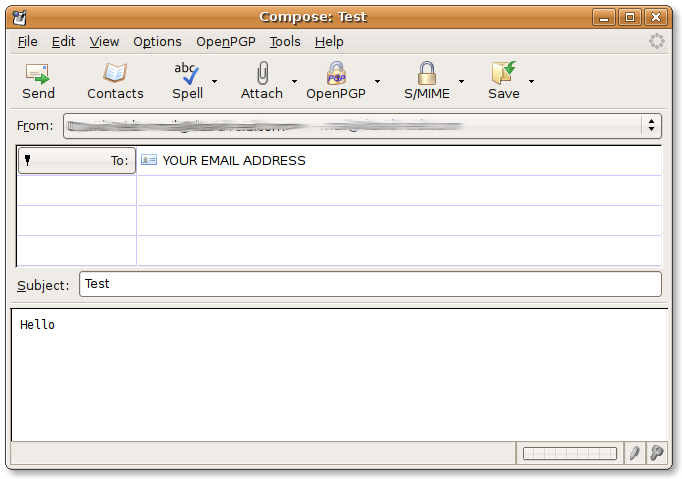
If the mail comes back to you, it's all working!
Security
In order to better secure your mail, you should change to using a secure connection for incoming mail.
- From the Account Options, select the account you have just created.
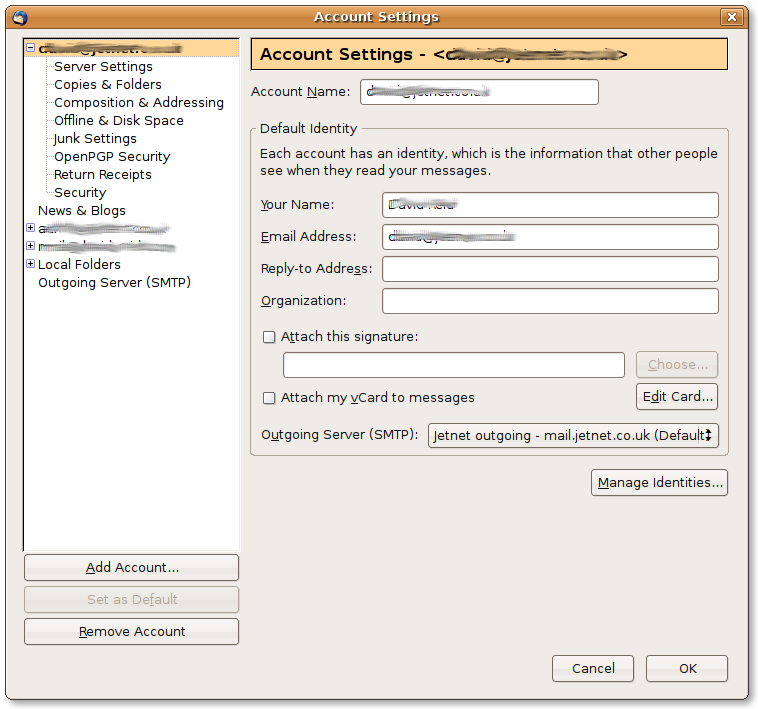
- Select Server Options. Choose SSL from the secure options.
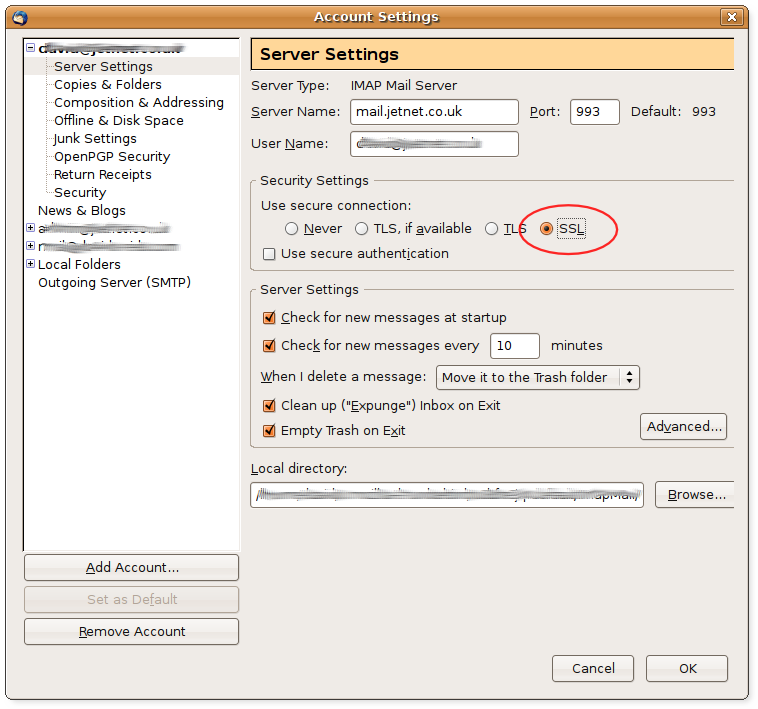
The other options shown are the ones I have selected and would seem to be sensible.